
Getting Started

The following article makes use of menu options added in version 13 of Salient. If you’re not seeing them available, make sure to update your theme and Salient plugins.

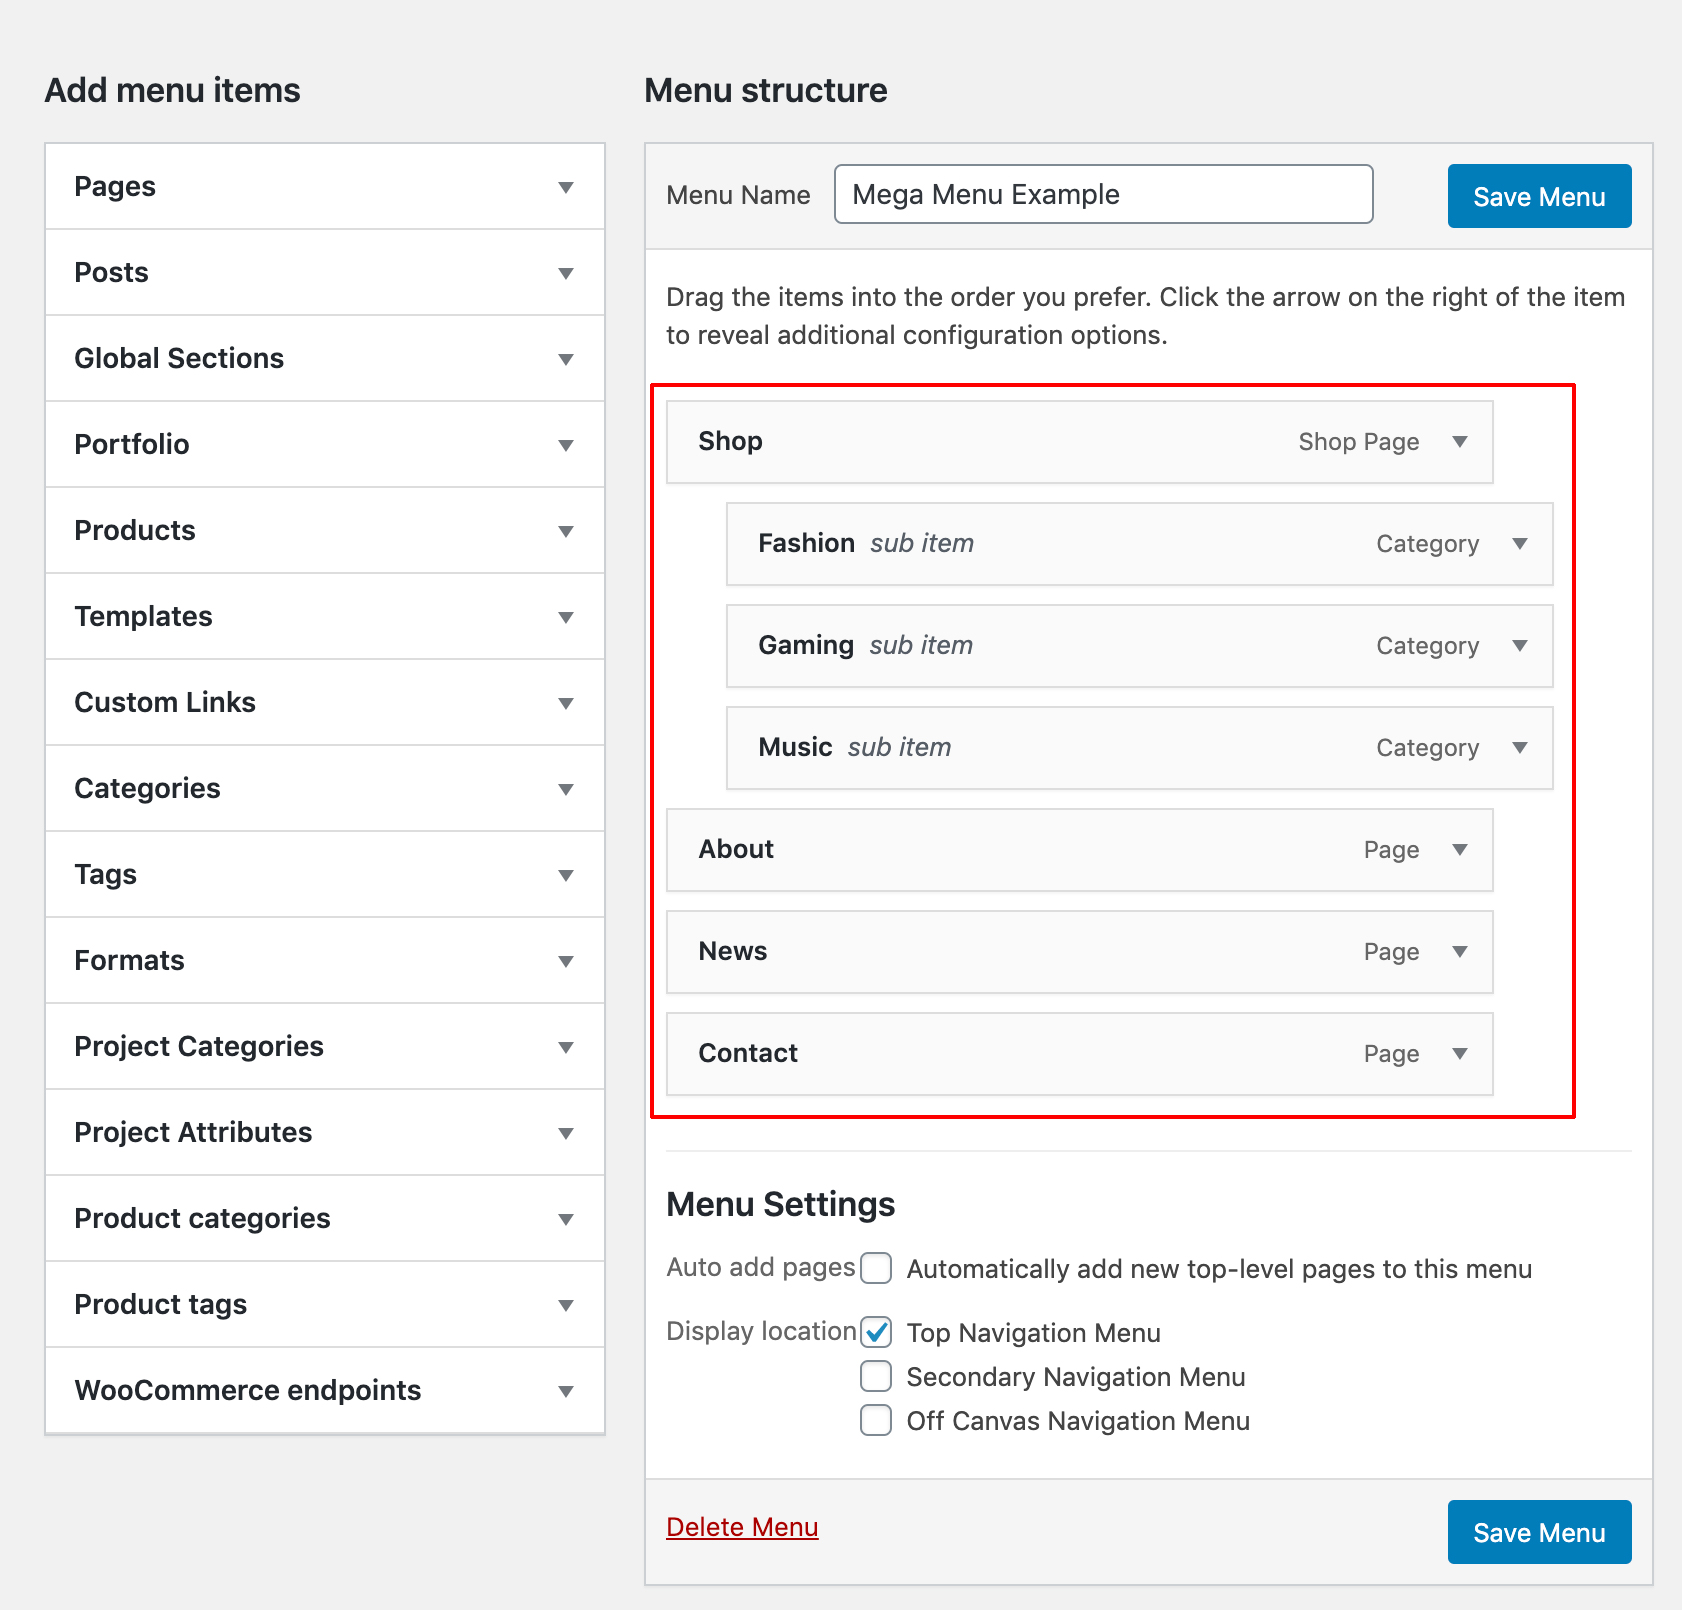
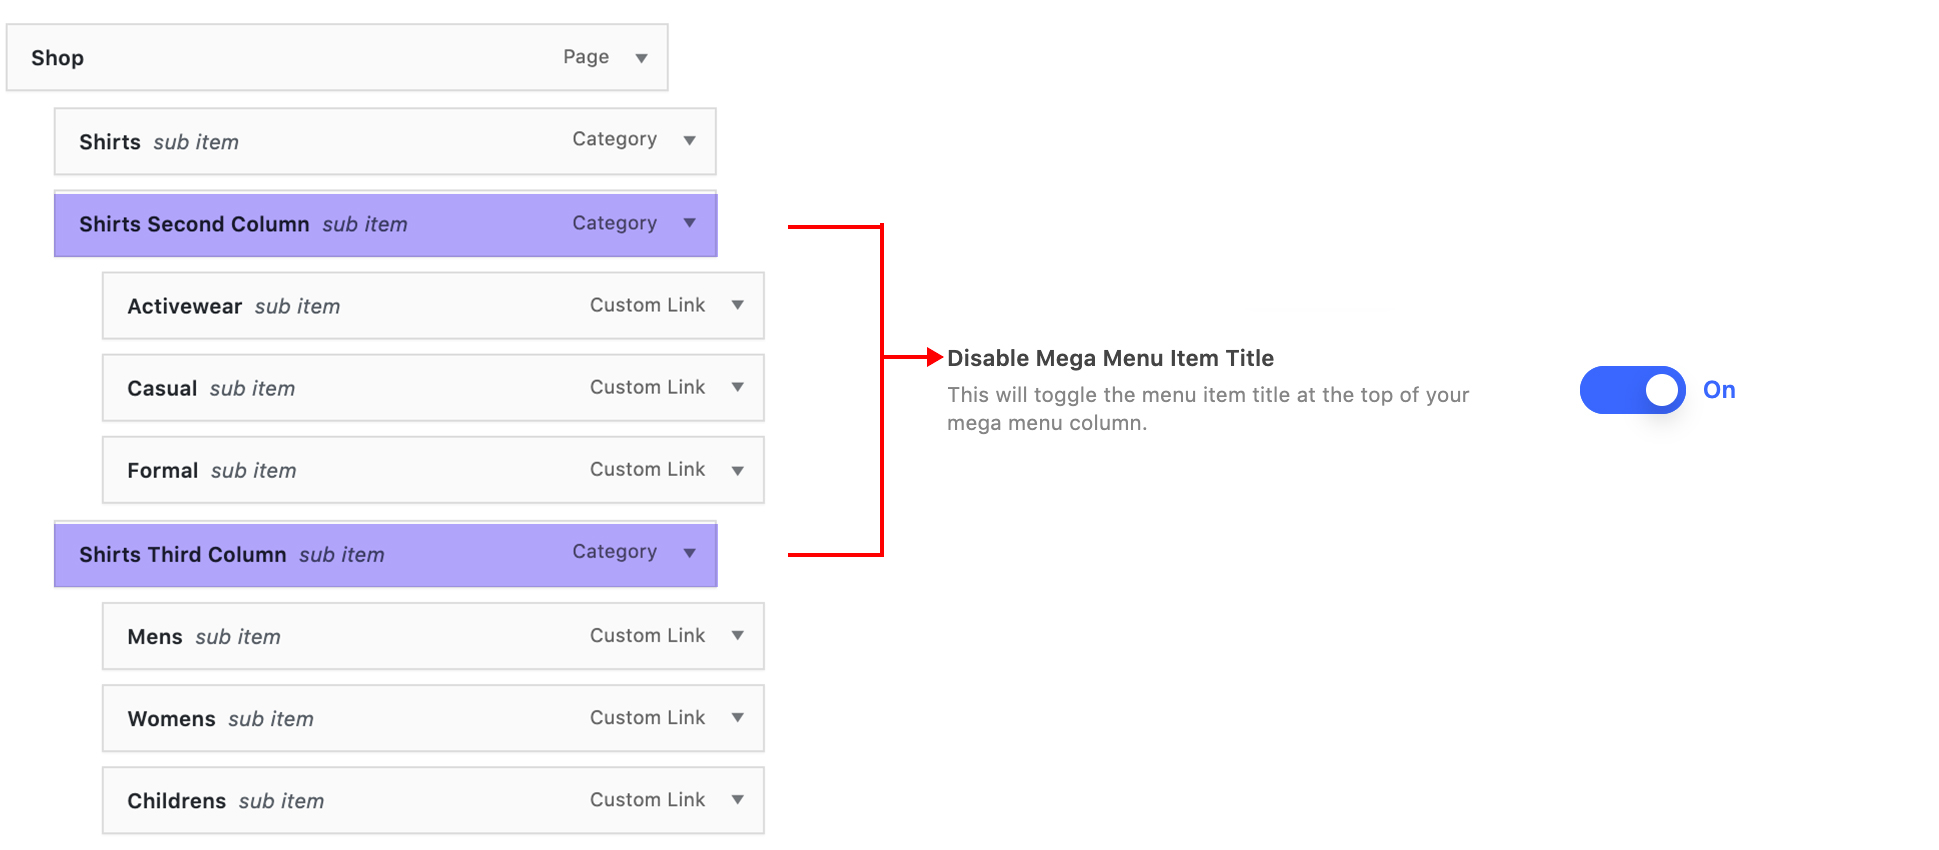
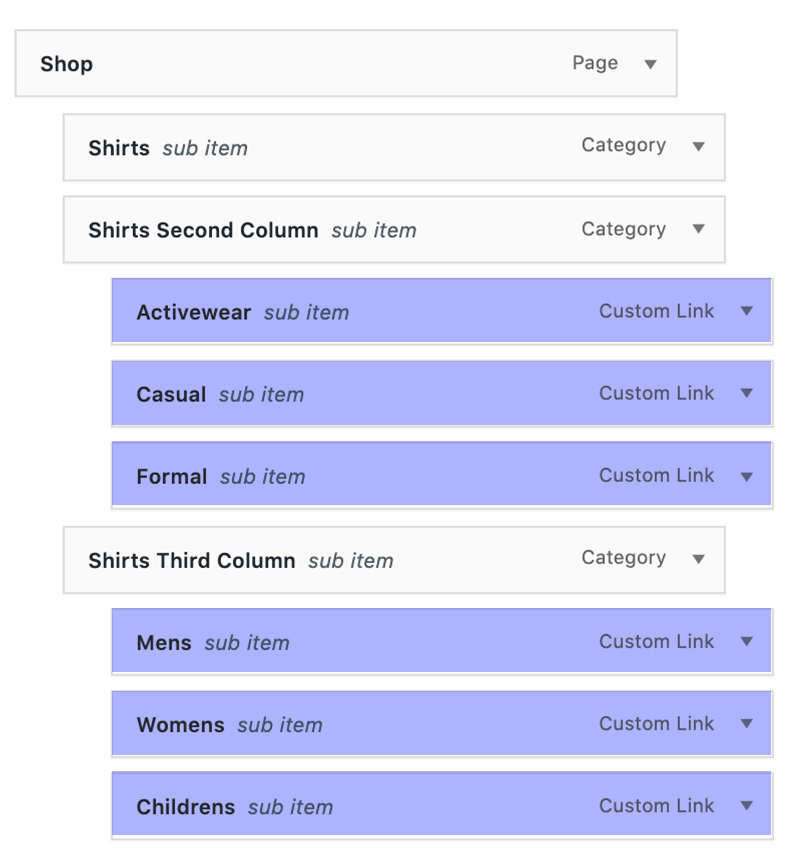
Head to Appearance → Menus in your WordPress admin panel. To start creating a mega menu, create a basic submenu structure by nesting a few menu items. In our example, we’ve moved three menu items to be children of the “Shop” item.

After setting that up, a standard dropdown will display for the child menu items when hovering over the top level item as demonstrated below.

Accessing the Menu Options

Opening any menu item will reveal an option labeled “Salient menu item options” at the top. By clicking that button, a modal will become visible with options specific to the open menu item.

How Menu Options Work

Options are grouped into tabs based on their category on the top. You can switch between each group by clicking on the relevant tab.

The menu items that are available will change based on how deep a menu item is nested. For example, top level menu items are the only items which can enable a mega menu, and secondary items have specific options relating to defining their column width within a mega menu.

Basic Mega Menu

To create a basic mega menu setup, we’ll add some additional child items and then enable the mega menu option on the top level item, “Shop”.

In a mega menu, each direct child menu item (denoted in blue below) will become a column. Further menu items can then be nested in each column (denoted in yellow below).

Front-end display

Hurray! We’ve created a basic mega menu, albeit a boring one. Before we start spicing things up by utilizing more interesting options. Let’s cover some quick common variants.

Variant: Multiple Headings Within One Column

Since direct children within a mega menu show their label as a column title, we can hide that by making use of the “Disable Mega Menu Item Title” option. With that option on, the direct child item will act only as a column, and not display any text. Further items can then be nested within the column (denoted in green below) and display their labels above each set of children.

Front-end display

Variant: No Column Heading Titles

Making use of the same “Disable Mega Menu Item Title” option as the above variant, we can simply remove the heading label from all columns. In this instance, we don’t need to nest an additional level since we don’t need any group headings.

Front-end display

Creative Example

Now that we’ve explored how to make a basic mega menu, here’s an example that takes the design up a notch by utilizing more menu options.

A breakdown of the menu options

Shirts Menu Item

Going through each mega menu section from left to right, we’ll take a look at the “Shirts” item settings first.

Blank Column Items

The next two child menu items have all the default settings, except for the menu item title disabled. This renders them as empty column holders for the nested menu items.

Icon Menu Items

All the remaining menu items within this mega menu example make use of the same settings, with different icons assigned.

Each of the menu items with icons also make use of the WordPress “Description” field to display a subtitle. If you do not see the description field in your menu items, ensure the following

  1. The description field is enabled in your WordPress screen options as shown in the below screenshot.
  2. The theme option is enabled to display descriptions within submenus. The relevant theme option is titled “Header Dropdown Display Descriptions”  and can be found in the Salient options panel → Header Navigation → Dropdown/Megamenu tab.

Video Tutorial

In this tutorial we take a look at recreating the mega menu featured on the main theme demo.