Salient Demo Importer Plugin
The Salient Demo Importer installs one of the Salient demos into your site, with its pages, images and theme options, so you start from a finished layout and edit it. It runs from a tab inside the Salient options panel.
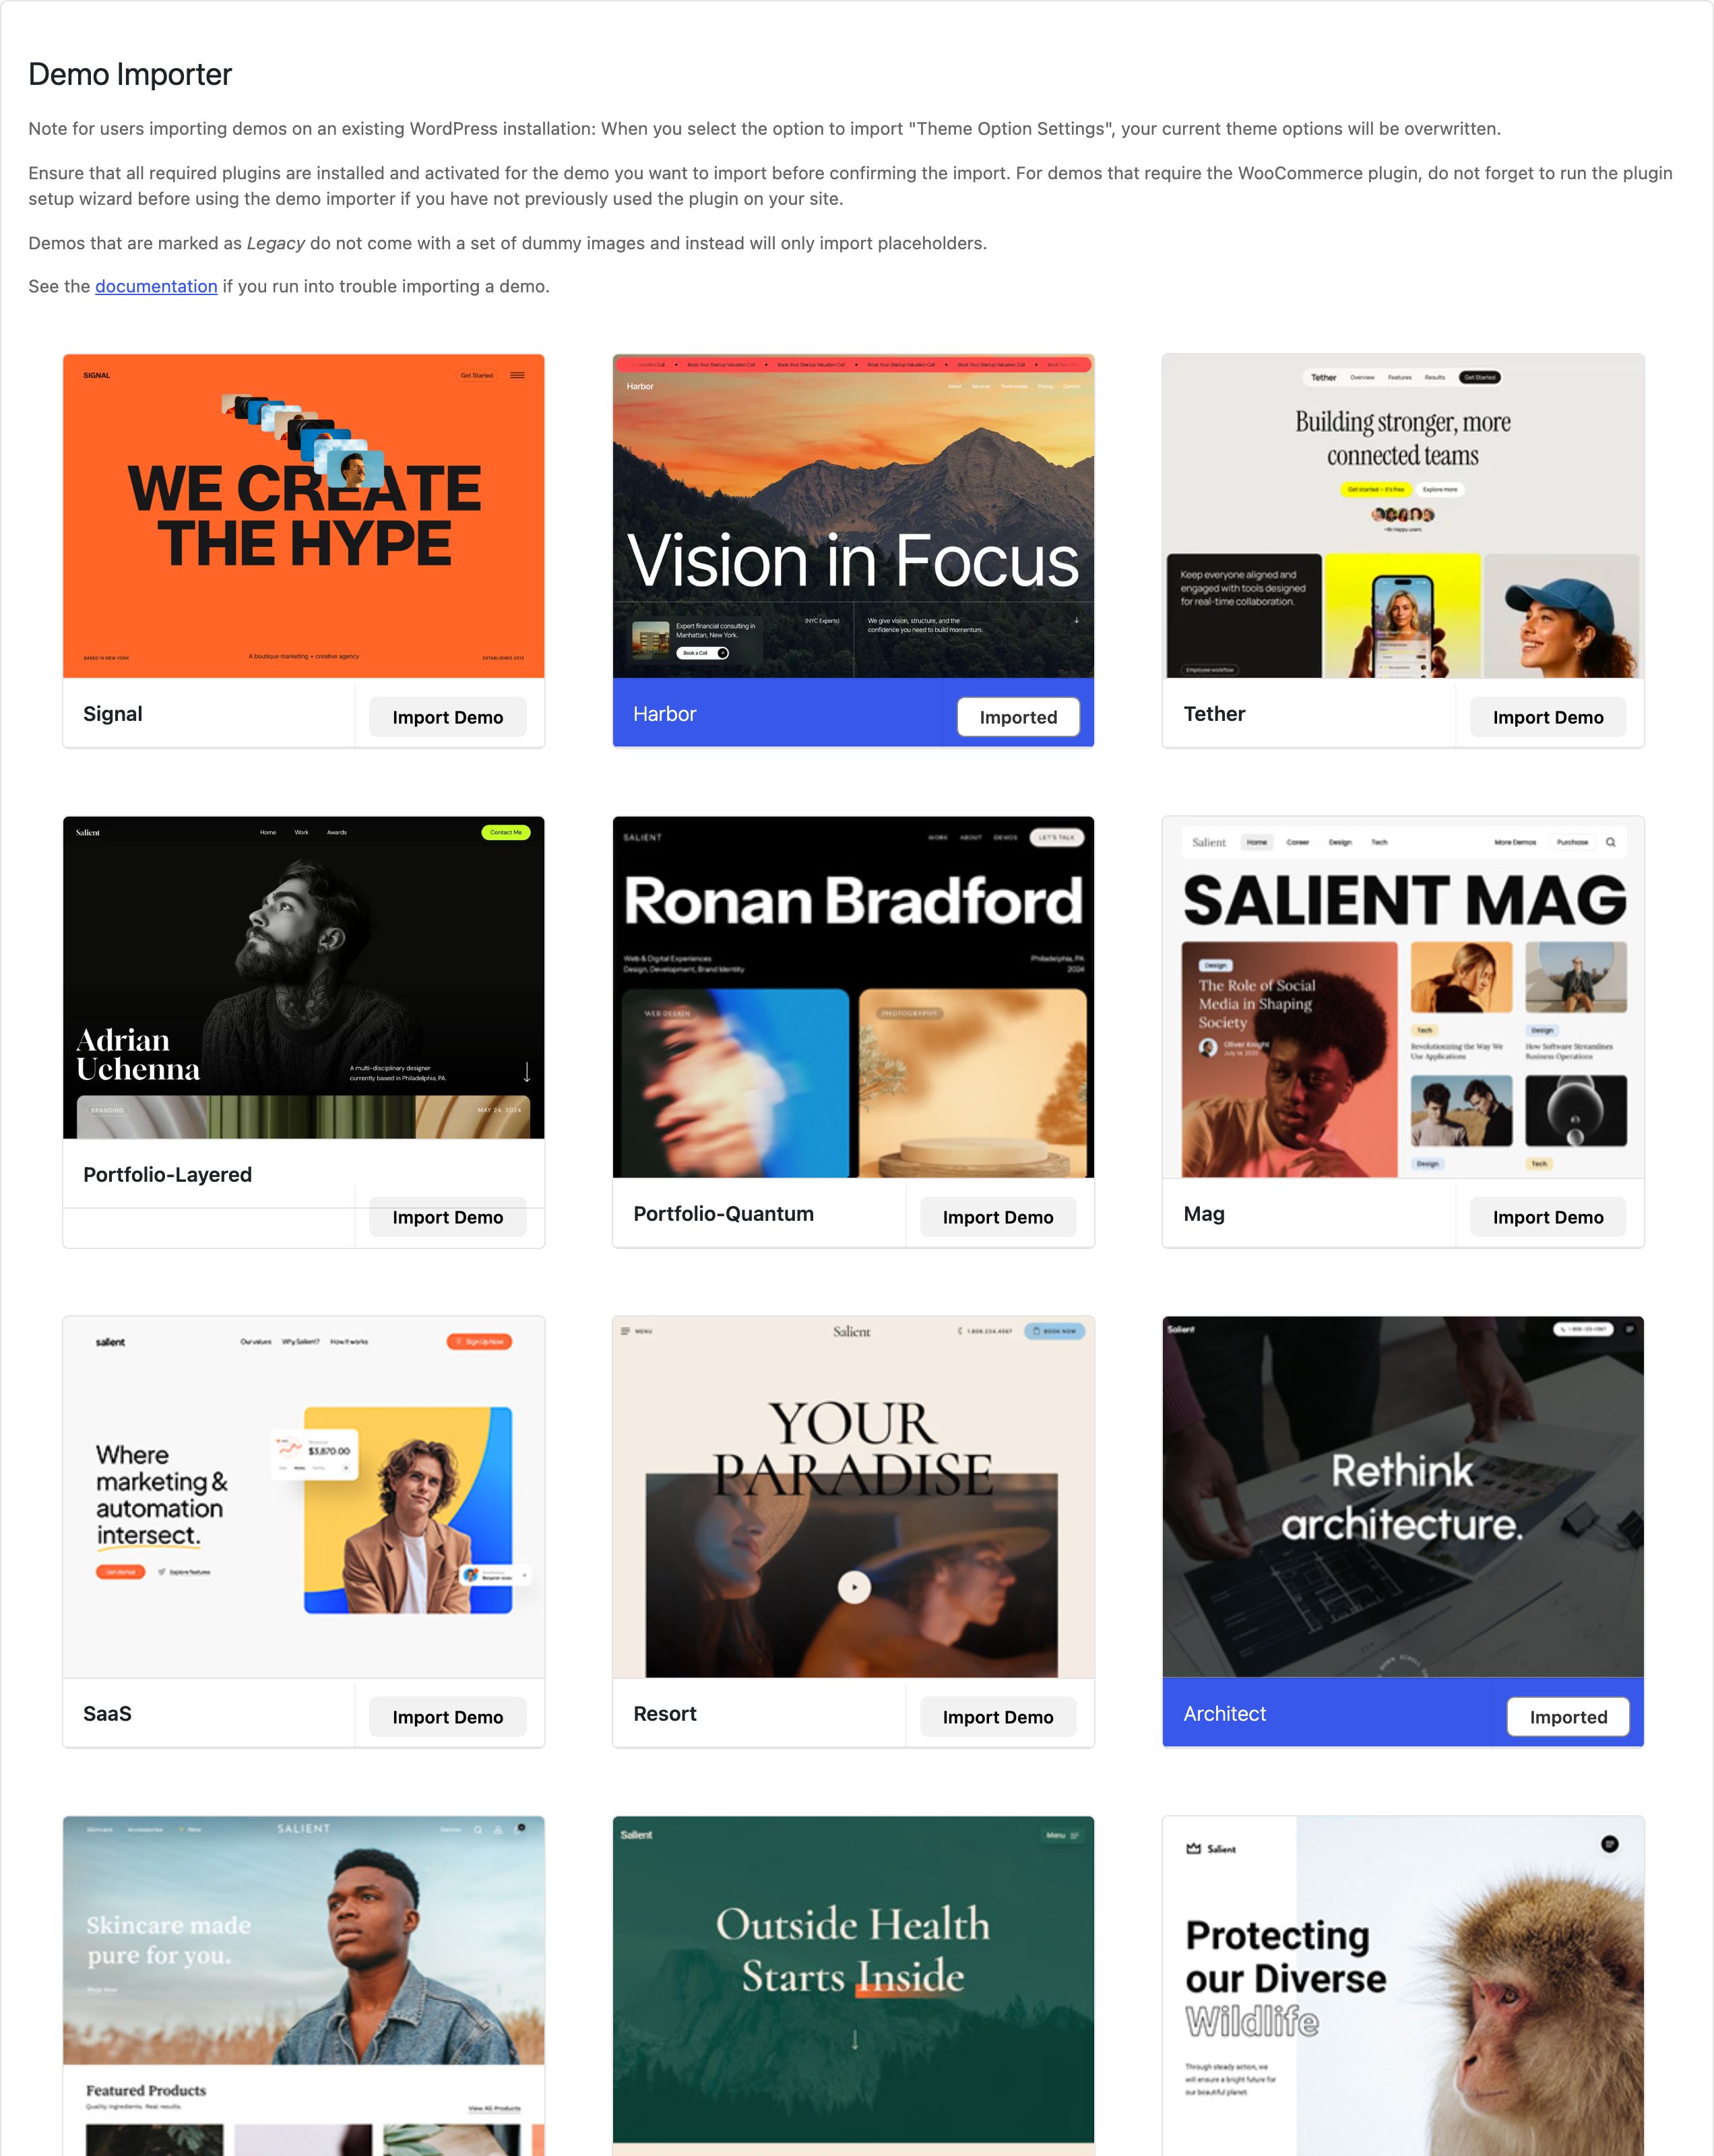
Every demo can be previewed before you import it on the Salient prebuilt websites page.
Accessing The Importer
The Salient demo importer is contained within the Salient options panel. To access it, first ensure that you’ve installed and activated the Salient Demo Importer plugin, then follow the steps below:
- Step 1. Head to the Salient options panel in your WordPress admin dashboard
- Step 2. Click on the Demo Importer tab on the left hand side of the Salient options panel
Importing A Demo
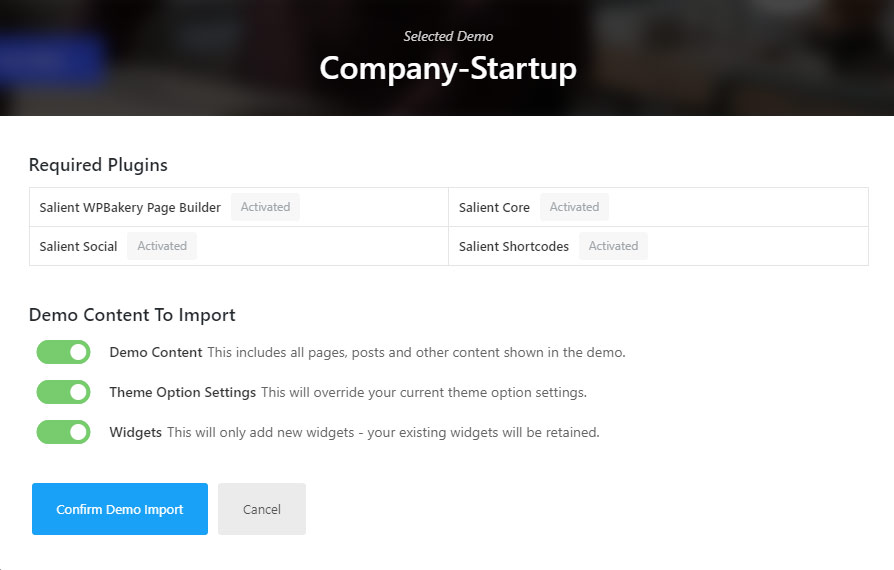
Once you’re ready to import a demo, click on the blue “Import Demo” button for your desired demo. A modal similar to the one shown above then appears. Within it you’ll find a list of the plugins used by the demo at the top. If a plugin is not already active, click the install/activate button next to it, as shown below:
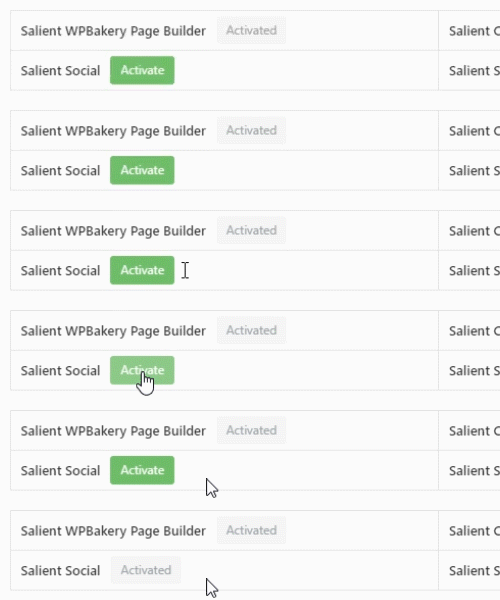
After ensuring the needed plugins are activated, you can select what to import from the demo.
There are currently three options to choose from:
- Demo Content The actual page/post content of the demo.
- Theme Option Settings The theme option settings. If you do not wish to override your current settings, disable this option.
- Widgets The widgets used for the demo, added to your Appearance > Widgets section.
Frequently Asked Questions
Demo Import Failing
The more images a demo imports, the longer the import takes. Demos added in v8.0 and above include a full set of sample images and can take a minute to import. Because of this, if your demo fails to import, it’s most likely because your server’s PHP max_execution_time setting is too low. max_execution_time can normally be set to 40 seconds to prevent server lockups from unresponsive scripts. If your demo import fails after loading for a while, you’ll need to increase it to allow the import to complete. If you’re unfamiliar with editing PHP settings, your hosting company can handle this for you. Here are the recommended PHP settings if you’re having trouble importing:
- upload_max_filesize: 35M or greater
- post_max_size: 35M or greater
- max_execution_time: 150 or greater
- memory_limit 128M or greater
WooCommerce Product Images Not Crisp
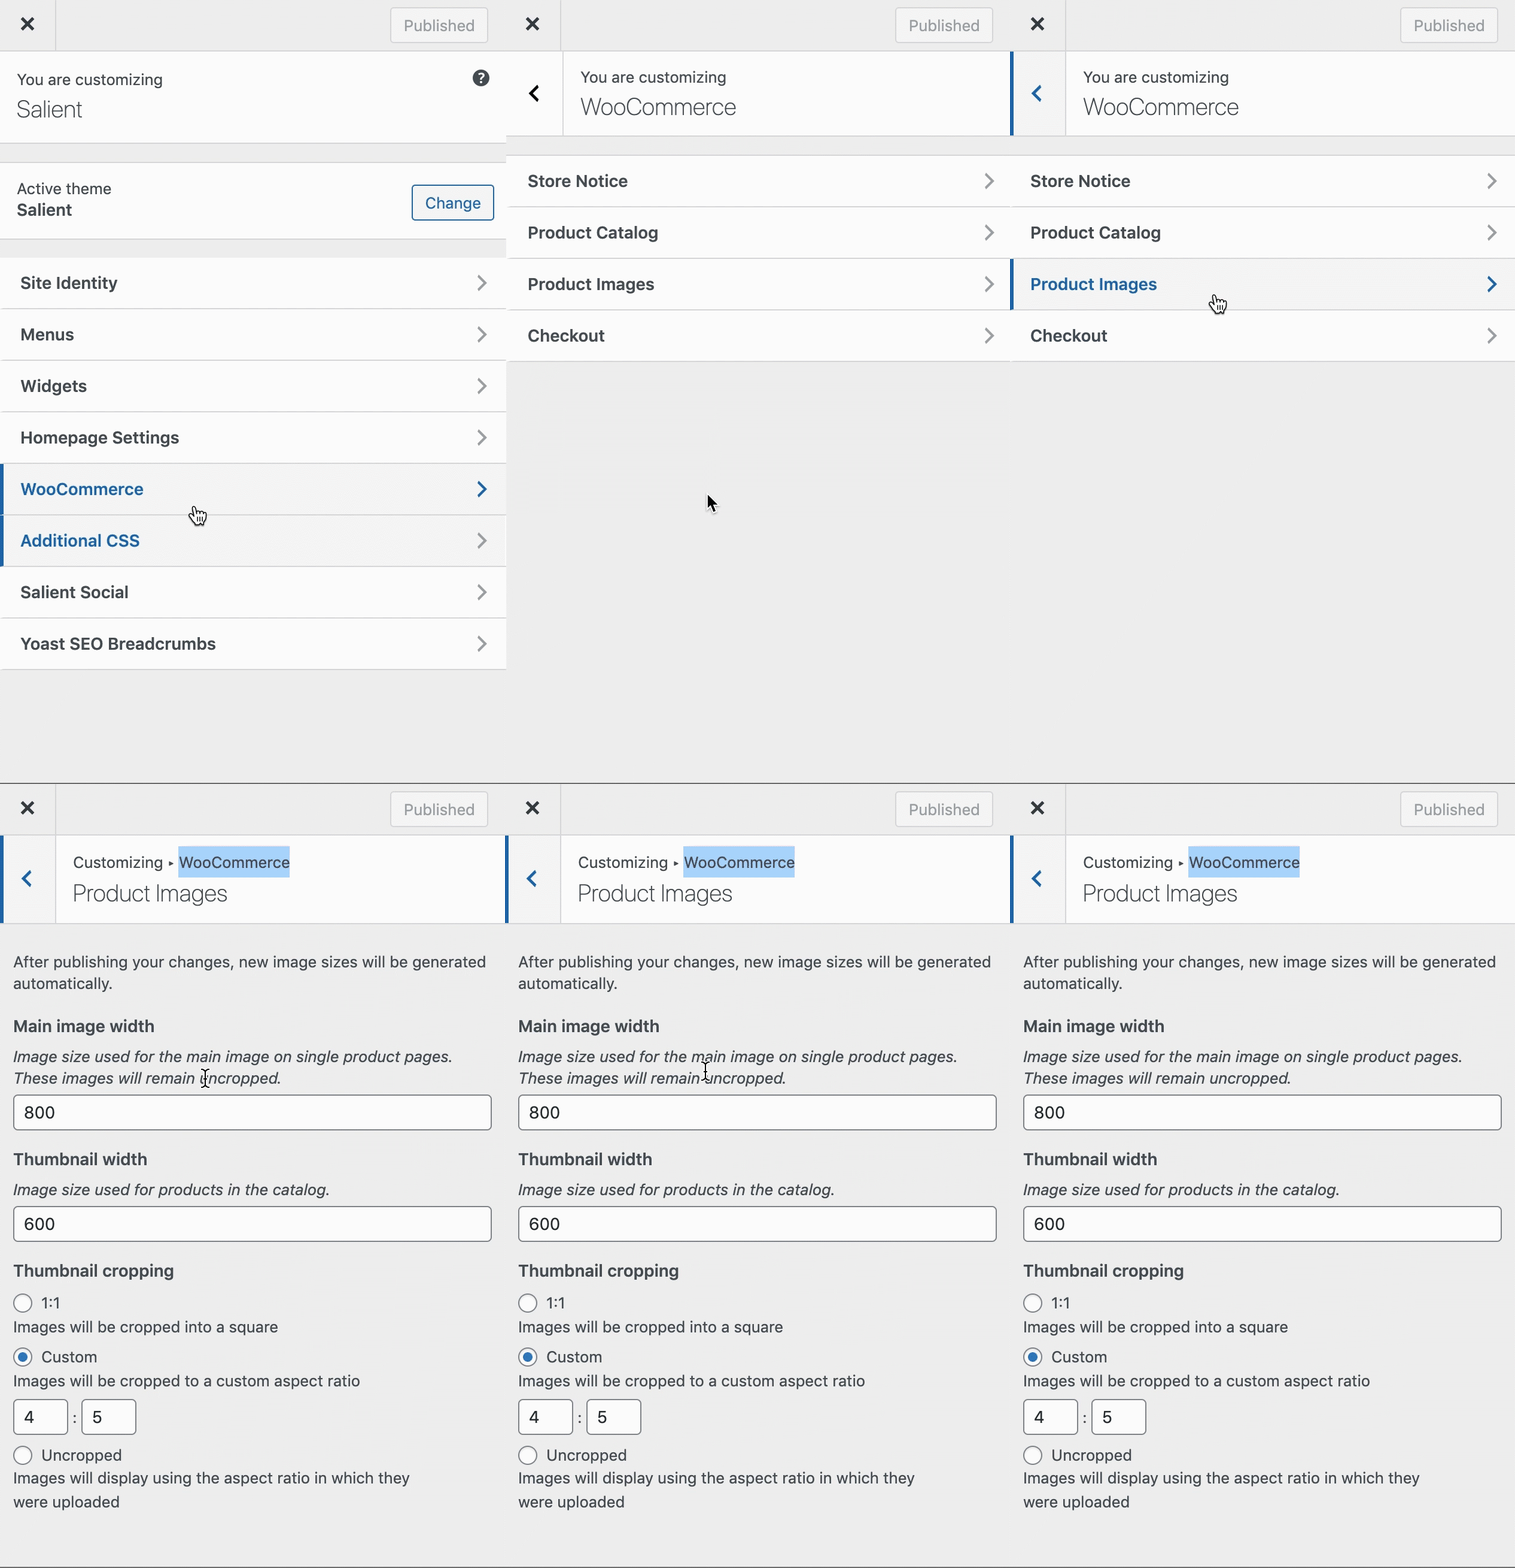
The image sizes for WooCommerce products are defined in the WordPress Customizer → WooCommerce → Product Images tab and default to slightly low values. Salient doesn’t force you to use a specific size, so feel free to enter any dimensions that suit your products and layout.
The commonly used settings we set in the WooCommerce demos are:
- Main image width: 800
- Thumbnail width: 600
- Thumbnail Cropping: Custom → Aspect Ratio 4:5